
"Welcome to the Imagine If Merry-go-round blog hop"
Jo is giving away a Merry-go-Round with horses
If you have joined in here you can start at Imagine if
Next with Tash Chanwai
Jo is giving away a Merry-go-Round with horses
If you have joined in here you can start at Imagine if
Next with Tash Chanwai
Vintage Mystical Merry-Go-Round

Hi everyone "WoW" what fun I had creating this chipboard project for Imagine if

First I assembled the pieces, then painted all my edges with a dark brown acrylic paint.
the paper was easy to cut to shape as there is a template included!
my paper of choice is Kaisercraft Magnolia grove, it gives a lovely vintage look.
I also have used Tim Holtz di stress ink "Vintage Photo" for the edges to age it a little more.

I have added some trim dyed with the Vintage Photo, I love how aged it looks!
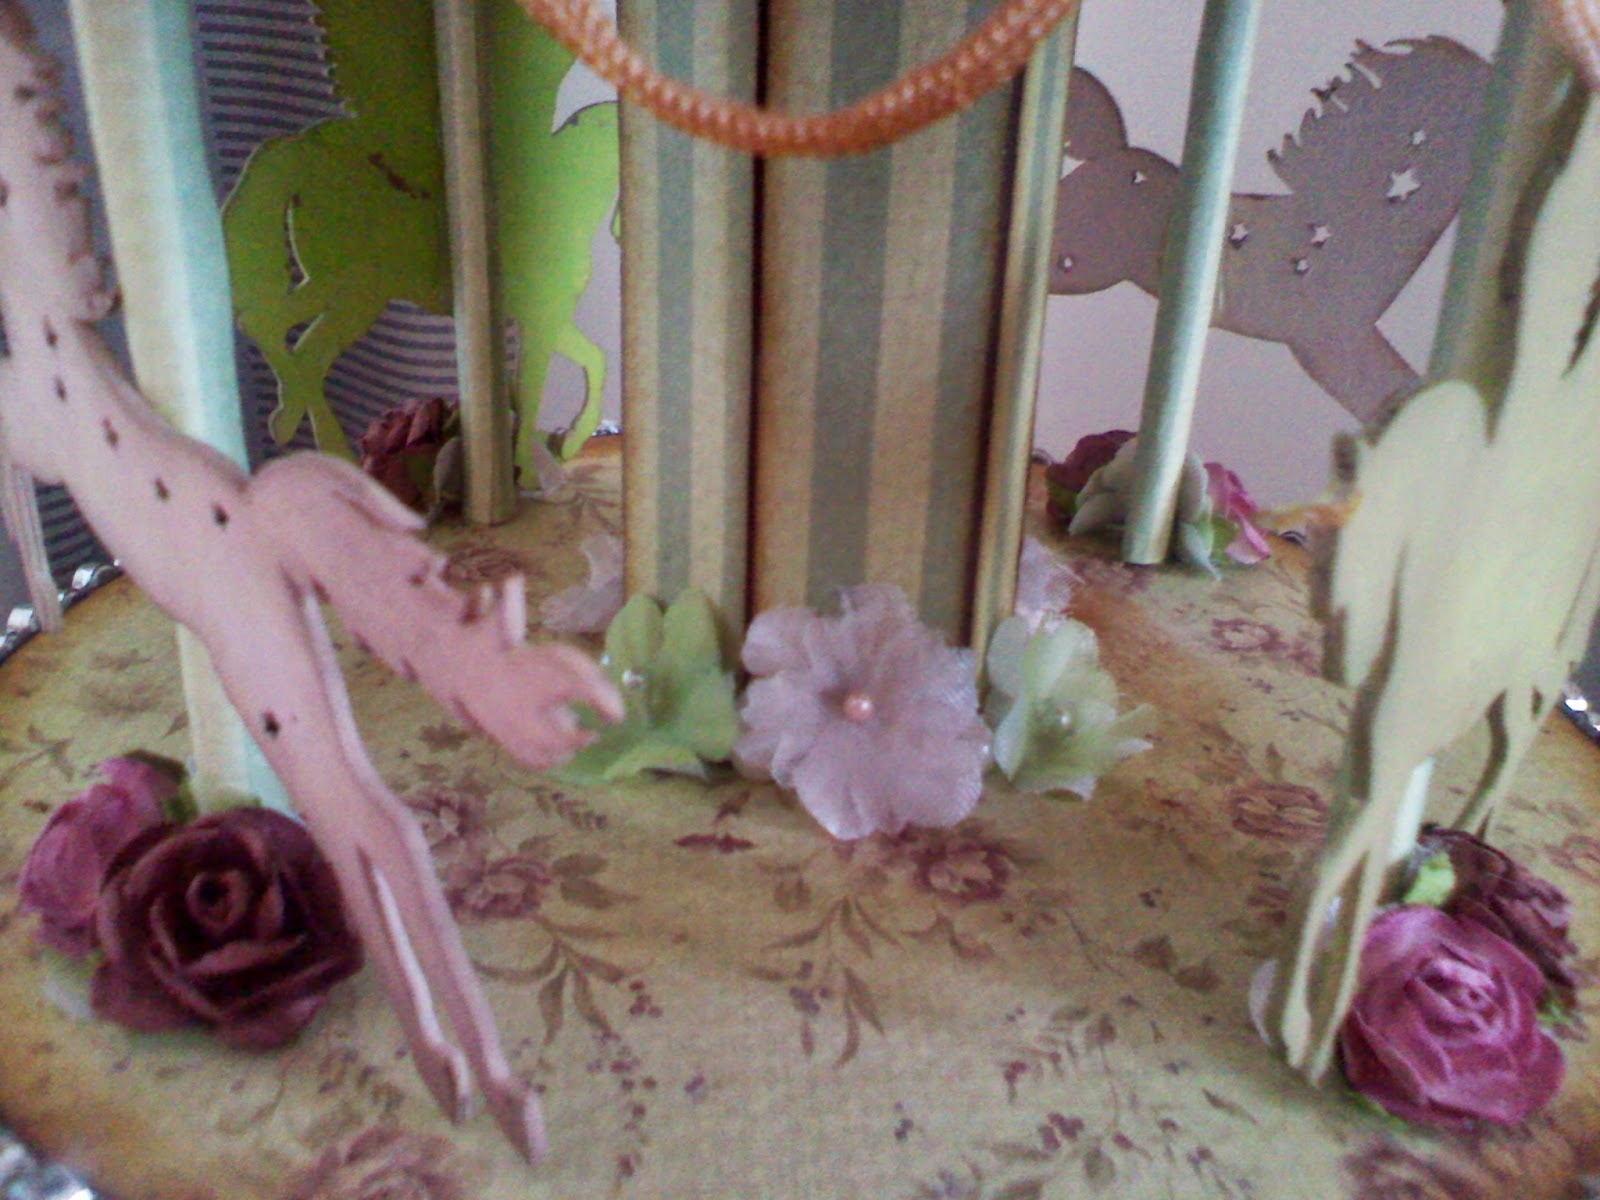
The poles are made from skewer sticks with a straw placed over it that I covered with matching paper.
The gorgeous Unicorns and Pegasus I painted and then spritzed with Vintage Photo added to water and used stickles on the horns

For me the fun really begins when its time to add all the "Pretties"
I chose tiny flowers in matching colours to add on the centre pole and base of the outside ones.

Next I had decided to not join the base to the merry-go-round and make it into a container so I added some trim that holds it in place for lifting off and on!


The laser cut trim that was in the kit I placed upside down to give some height and age to it and then added a touch of pearl trim.
I hope you enjoyed this Tutorial for the first of my June DT Projects
Pop on over to Imagine if and have a look at all the amazing laser cut chip board, card and felt supplies!
The next stop in the blog hop is Beth Barnes
a Rafflecopter giveaway
This is brilliant. I love that you went with a container idea!
ReplyDeletethanks Lainie and good luck :)
DeleteThis is just beautiful! My little granddaughter would love it. Well done!
ReplyDeleteHi Debbie :) I know she would...good luck
DeleteBeautiful I love it well done.
ReplyDeleteHi Brenda Good luck :)
DeleteI like that you have given it a purpose!
ReplyDeleteThank you and good luck :)
DeleteReminds me of a circus. I can just picture children clambering up for a ride - nostalgic
ReplyDeleteHi Marilyn :) what a gorjuss vision!
DeleteI love the idea of it being both useful and decorative. It's gorgeous.
ReplyDeleteHi there thank you and good luck :)
DeleteI love it.Thanks for the idea of making it into a container. You could put a mini album in it.
ReplyDeleteHi there and thank you...I am such a mini album lover it was very hard not to add one :) but I thought it would be gorjuss to stash some secret notes and maybe jewels ;) good luck!
DeleteLOVE ITTTTTTT your such a talent to the DT Lilian, just gorgeous my friend :)
ReplyDeleteHi Tracey :) thank you and good luck!
DeleteLove the trim at the top. you do amazing work. fabulous style.
ReplyDeleteHi Maureen isn't it gorjuss, thank you and good luck!
DeleteOh wow, such a beautiful altered project. Creative indeed! X
ReplyDelete